![How to Groom a Westie: The Most Comprehensive Guide for Your Westie Puppy [+Video]](https://westievibes.com/wp-content/uploads/2019/10/HOW-TO-GROOM-A-WESTIE-GUIDE.jpg)
Adopting a Westie is one of the best things we have ever done. It has given our life so much joy and love. However, we also cannot deny the fact that getting one also required a lot of responsibility, such as learning how to groom Sami, our Westie.
Fortunately, with a little bit of practice and proper tools, these responsibilities are not going to be so much like chores. Instead, they have opened a lot of opportunities for parent-and-Westie bonding moments.
Today, we are going to talk about one such responsibility: grooming. We will be sharing with you different grooming tools, a guide on how to groom your Westie, a lot of helpful tips, and more!
Important Things to Remember
We are going to share with you a complete step-by-step guide on how to groom your Westie in a bit. Just allow us to give you some safety reminders and helpful tips.
Safety Considerations
To ensure your safety as well as your dog’s and other people around you, here are the things to keep in mind:
1. Know How to Handle Your Pet Properly
In connection with the previous tip, there will come a time when you’d have to hold your pet still. When this happens, you need to know how to grip it properly. Never pull on the fur or a limb since you might risk injuring your pet. Additionally, while your grip should be firm, it shouldn’t be too tight that will cause you to hurt the dog or force it to fight its way out of your grasp.
If your Westie does want to break free, just be patient. Wait for your pet to calm down, reassure it, and just start again where you left off.
2. Expect Your Pet to Move
It doesn’t matter how well-trained your pet is or how much they trust you. If it’s the first time you’re grooming your Westie, then expect it to move around a lot. It’s a new experience, so it’s normal for the dog to feel stressed.
Even dogs used to being groomed by pros might get fidgety if it senses your uncertainty. Hence, just anticipate this and get ready for it.
Keep your grip firm, but do be careful not to grab him by his legs. His joints are sensitive so make sure you grab by the collar or from underneath the body. Always keep the grooming tools out of its reach. Be extra careful when you’re grooming near the eye area, and finally, maintain your patience and be calm at all times.
3. Learn and Practice How to Use Grooming Tools Correctly
Using grooming tools might be pretty straightforward, but it’s an entirely different thing to be actually using them on your pet. For instance, use a guard when you’re clipping your Westie’s nails, but learn how to use it that it won’t obstruct your view. If it comes down to it, it is better not to use a guard if it will allow you to see clearly than using the guard blindly.
Learn about the proper dog clipper speed setting required for each situation. Always sharpen your blades: nail clippers and dog clippers included. Finally, be extra careful in using a hairdryer on your pet to avoid burning its skin.
Pro tip: Always stick to a low setting since it won’t frighten your dog too much.
4. Dress for the Occasion
Here is a common mistake home dog groomers make: they forget the importance of wearing personal protective equipment (also known as PPE). While there is no standard PPE, most pros wear the following:
- Non-slip shoes - this is important since you're handling pointy tools around your dog
- Skin protection: make sure you're wearing long pants and arm coverings, preferably made of a material that hair doesn't easily stick to
- You can use a waterproof apron, since you're going to get wet
- If you want to be extra careful, you can use eye protection; there are protective goggles especially designed for this purpose (although we never felt the need to use them)
- Respiratory protection is another extra extra step - any paper mask you can use to cover your nose and mouth will do, since hair is going to be flying around
You will need to wear non-slip shoes since you will be using soap, shampoo, and other slippery elements. Not to mention that you’re also going to handle sharp tools, so having non-slip shoes will make sure you stay safe.
Unfortunately, since home groomers don’t really think their beloved Westie will struggle, scratch, or bite while being groomed, most just take skin protection for granted and wind up with scratches on their arm, like me. The nails are particularly sharp after cutting, so your Westie may not struggle necessarily, but just grazing your arm with their paw is enough to leave a scratch.
A lot of us don’t use disposable gloves when grooming our dog. That’s understandable since there’s no risk for cross-contamination if you’re only grooming a single dog, right? That’s a valid point.
Do remember, though, that you may also be required by your vet to apply medicated products—solutions that might contain ingredients not suitable for human skin. Don’t risk getting your skin irritated and just get yourself a box of disposable latex gloves.
They’re not that expensive anyway, and while you’re at it, get a pair of goggles too. These will protect your eyes from flying chips of your dog’s nails, hair, and other elements that might cause eye irritation.
Finally, expect that a lot of dog hair will be blowing into your nose and mouth during the grooming session, especially on the coat clipping part. As such, prepare a reliable protective mask to avoid inhaling these airborne particles.
5. Focus
Always do one thing at a time. Don’t try to tackle so much on your first grooming session. Know that it is a learning process, and you will get good at it as you go. Also, perform your grooming sessions in a well-lit space where you will not get easily distracted.
That means we don’t encourage having kids around while you’re grooming your pet, and please don’t multitask. Don’t answer your phone or chat with someone while you’re grooming, and if it’s really needed, never leave the room with your pet free and the grooming tools within its easy access.
Other Tips
Aside from the safety precautions we have shared with you above, here are other tips to remember:
- Prepare all the grooming tools that you need in advance. This will minimize the instances where you’d have to stop what you’re doing or worse, leave your pet just to get something from another room.
- Stick to the basics first. Accept that you might not be able to make your Westie look like a show poodle for the first time—and you don’t have to make it look like one! Just keep your pet well-groomed and looking classy, not looking like a clown.
- Use natural products. Avoid using grooming products with harsh chemicals that might harm your pet no matter how promising it might sound. When in doubt, ask your vet first.
- Groom regularly. Don’t let weeks go by without grooming. It can cause skin problems, and the worse thing is, you might not even notice it right away due to its thick unruly fur.
Not only that, can you imagine how much more challenging it can be to deal with months-long unwashed and uncombed coats? Not to mention that you will be working with a dog that’s already uncomfortable even without hearing the buzzing noise of your clippers yet!
- Clean your grooming tools immediately after use. Cleaning your tools is part of the grooming session. Don’t put it off until later no matter how tired you are. We understand that this can be especially hard after a long and stressful session, but this step is vital if you want your tools to last long.
- Finally, don’t forget to clean your space. Leaving fur, dander, and other elements out and exposed can be harmful for you, your family, and your pet’s health. This should be a priority immediately after you’ve taken care of your grooming tools. Again, this is still part of your grooming session. Don’t skip this step!
By keeping the tips we shared with you in mind, we are sure that you will be able to groom your pet properly without any safety issues. In time, you might even find it an enjoyable activity to share with your pet regularly, and one that you and your pet will even look forward to it! At least, we sure hope so because that is the case for us.
Anyway, now that we are all ready to get started, we can finally move on to the exciting part—the actual grooming session. You will find a quick step-by-step guide down below.
How to Groom a Westie: DIY Guide
At long last, we are finally going to learn how to groom a Westie. Just follow the steps below. Don’t worry; we’ve kept it really simple. You can also see a video of our Sami being groomed recently.
1. Brush Your Westie’s Coat
This step should be done regularly. Daily, in fact! We have already shared with you the different kinds of brushes and combs. Choose one that suits your dog’s coat.
Some Westies have finer hair, while others have thicker and coarser ones. Don’t be afraid to experiment on different combs and see how your Westie reacts.
Does it hurt your dog? Does your dog find it relaxing? We recommend starting your brushing process at harder-to-reach areas, like under his limbs and back area. Work your way through until you combed out all lose fur strands and matting.
Don’t rush! Detangling all those knots even before you bathe it will make the grooming process faster and easier later on. Not to mention that brushing can calm down a pet who's already anticipating and worse, dreading the grooming steps that are going to happen next!
2. It’s Time to Give Your Westie a Bath!
Read the instructions of the products you are going to use first. Some dog shampoos require you to soak the product for five to ten minutes on your dog’s coat before rinsing. To lather, put a dime-sized amount of product on your hand, and apply it to your dog’s wet body.
Add as much product as needed in order to give his entire body a good scrub. When ready, rinse your dog’s body thoroughly with water.
How Often Should You Bathe Your Westie?
Other experienced Westie parents recommend limiting the bathing to just three to four times a year. That’s due to the sensitive nature of a Westie’s skin which can also quickly dry up and get irritated if you bathe the dog more frequently.
We recommend bathing your Westie once every one to two months. Just make sure that the products you are using are rich in moisturizing ingredients.
Take this information as you need it. Different dogs and their parents have different needs. Some dogs require to be bathed more frequently (like our little explorer), while some dogs can last for six months and still look reasonably clean.
If you do choose the twice a year approach, we recommend getting a dry shampoo product just to give your dog a quick refresh every once in a while, and if it helps, you can rinse the dirtiest parts of its body, like its paws, more often. You don’t need to give it a full bath every single time. You can simply spot clean certain areas when needed.
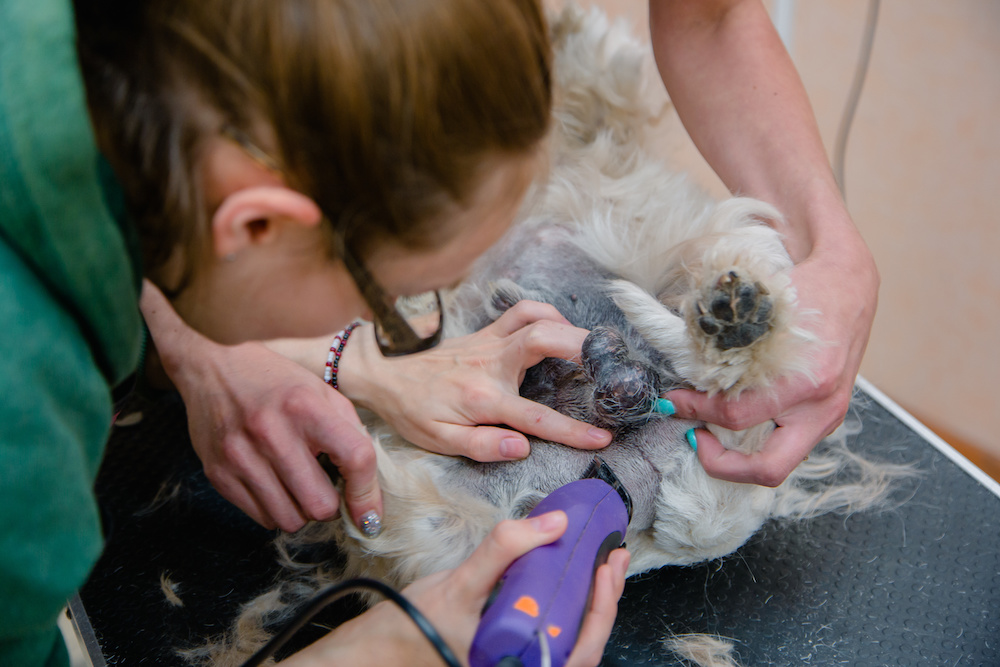
3. Clean Your Westie’s Ears and Snip Its Nails
Dry your buddy thoroughly and as what we advised above, be a little easy on the dryer. Once the dog is dry, you can now move on to the next part of the grooming session—ears and nails. Why just now, you may ask? That’s because the build-up in its ears and tough nails would have softened after bathing.
Use the ear cleanser you have as instructed in the packaging or as advised by the vet. You can then wipe its ears further with the wipes if needed.
Next, trim the nails to their ideal length. It should be just enough not to hinder its walking, but not too short that it might hurt your dog.
Your pet might be buzzing with energy by now from being held down too long and after everything you’ve done. As such, this is the perfect time just to pet your dog to calm it down and get it ready for the next process. Take your time..
4. Time to Trim That Fur!
We mentioned above that each owner has their own ideal time on how often they groom and bathe their pet. Keep in mind that this will also determine how much length you want to trim off.
If you only bathe your Westie twice a year, then you might want to get in there and take off as much of its coat as you can so that it can stay and grow at a comfortable pace and length for much longer. On the other hand, you don’t have to cut down too much if you groom your dog more often.
Use the guide combs to make the cut uniform. Start with the harder parts to reach and trim, then work your way through its body. Again, be careful of the eye area! Leave the tail and face area until you're done with its body. There will be parts where the fur is still going to look too long or uneven. You can just straighten it with a pair of scissors, preferably the scissors that came with your clippers.
If you have a particular style in mind, then we advise you to search for online tutorials and demos for reference. We encourage beginners to stick to a plain and simple trim, though.
Congratulations!
You have just finished a complete grooming session. Your Westie must really look and smell good right now. Don’t forget to play with your dog after and maybe even give it a piece of its favorite treat or two. Reward your pet after each grooming session to associate the experience with food and fun.
So, how did you enjoy the experience? Some pet parents enjoy DIY grooming, while others flinch at the idea even before they have tried it out themselves. If you’re a little confused on which method to choose, here are a few things you should consider:
1. Your Time
Let’s face it. Grooming might be a fun bonding experience to share with your dog, but it takes a lot of time to do so, especially for a beginner. Professional groomers, on the other hand, can work fast and efficiently thanks to their know-how and experience.
2. Your Effort
You might enjoy the bathing and clipping process but what about the other tasks involved in your grooming sessions such as tool maintenance and clean-up? These are chores that you would obviously be spared from if you simply take your dog to a groomer.
3. Your Budget
Professional grooming costs a lot. That’s because you’re paying for your groomer’s expertise, the facility’s supplies and equipment, and of course, the labor involved. Meanwhile, DIY grooming will involve an investment upfront, especially if you’re going to build your own grooming kit from scratch.
Nonetheless, it will also cost significantly less in the long run. The only time you would have to spend again is once you need to replenish your supplies and replace your clipper’s blades, and that’s it!
4. Your Dog
Of course, let’s not forget your dog’s temperament. Some dogs feel more comfortable with a pro, others prefer DIY grooming, and there are even dogs who don’t want to be groomed at all!
In the end, it’s all up to you whether you want to diligently groom your pet yourself regularly just to spare the dog the stress, or if you want to leave your overactive dog to the hands of experts who know what they’re doing.
Also, keep in mind that another benefit of going to a professional groomer is that most of them can catch the early symptoms of a developing health issue. They can see the state of your dog’s skin, ears, and genital area—parts of the body that will be the first to show changes to your dog’s physical condition.
Who knows how many dogs have been spared from suffering from a more serious medical condition thanks to the trained eyes of their professional groomers?
We understand that some owners will still prefer going to a professional groomer in the end. After all, if you have the budget and your dog will look better, then why not, right? If this is the path you want to take, then please allow us to assist you by providing you with some tips on how to choose a good dog groomer.
Basic (And Not so Basic) Dog Grooming Tools
For you to groom your Westie safely and efficiently, you need to invest in the right tools. Here is a list of the essential tools you would need, as well as our recommended products for each tool:
1. Brushes and Combs
The first thing you’d like to do is to brush and detangle those soft and curly furs. There are different types of dog brushes and combs to choose from, but the choice all boils down to the type of coat you need to brush out.
Here are the different kinds of dog brushes and combs:
- Slicker Brush: This brush is suitable for different coat types, and you can use it to detangle and remove loose fur strands. It has either a flat or curved head with several rows of bristles made of thin wire pins.
- Pin Brush: This brush is somewhat similar to the slicker brush. The main difference is that this brush has bristles tipped with rubber or plastic which make them look like little pin heads; hence, the name. This brush is best for dogs who have longer coats.
- Bristle Brush: For pups with shorter coats, you’d want a bristle brush in order to remove any debris hanging from their fur after their indoor or outdoor adventures.
- Shedding Blade: This is great to remove loose fur. It might sound scary, but in reality, this comb has a shape like a horseshoe with small, short bristles. This is perfect for pups that have flat or short fur.
- Undercoat Rake: Finally, the undercoat rake looks like your standard pin brush.With that being said, since it is intended for dogs with really heavy fur, it has far fewer and longer bristles.
Our Recommended Brushes and Combs
If you don’t know which ones to buy for your Westie, then maybe our favorites can give you an idea! Here they are:
1. Hertzko Slicker Brus

We enjoy using the slicker brush by Hertzko because our Westie finds its bent wire bristles relaxing. These bristles are effective to detangle our pet’s coat, make it shiny, and remove debris and lose strands.
However, our favorite feature has got to be its self-cleaning mechanism. With just a push of a button, the bristles will retract, which allows us to easily remove patches of loose fur from the comb, making the brush ready for use again.
To learn more about the product, here is a quick rundown of its pros and cons.
Pros:
- Comfortable for both you and your pet
- Convenient and easy to use
- Made of a durable material
Con:
- Westies with thinner coats might not enjoy the long bristles
2. Poodle Pet Detangling Comb
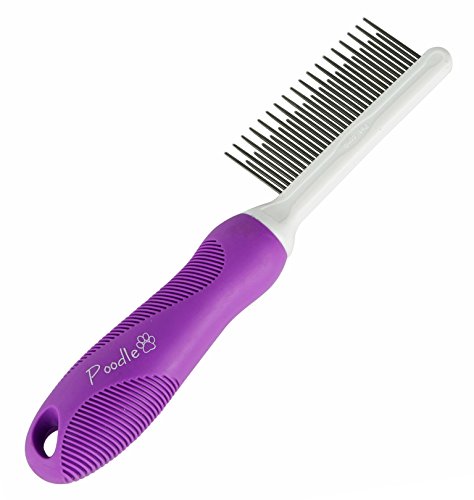
Another favorite grooming tool of ours when it comes to brushes and combs is the detangling metal comb by Poodle Pet. It comes with a combination of long and short metal bristles specifically designed to remove knots on your Westie’s fur and help with matted hair.
These bristles end with rounded pins to make sure they are comfortable for your pet. Additionally, its bristles are made with stainless steel. The comb also comes with an anti-slip grip for durability and comfort. Find this product’s pros and cons below.
Pros:
- Comfortable for both you and your pet
- Reduces cutting time in half with the dual bristles
- Made of a durable material
Con:
- Some dogs may find the bristle uncomfortable, (but our Westie loves it!)
In the end, finding the right grooming brush and detangling comb might involve a trial-and-error process. It can take some time to find a piece your Westie specifically loves. Each of our Westies has their own distinct personalities and preferences, after all. It’s all part of the fun!
2. Nail Trimmers
After we’ve combed their precious fur, we can now move on to grooming their nails. The length of their nails can also affect their gait. Also, keeping your Westie’s nails short is important to prevent them from cracking. There are two ways to go about it: you can clip it or grind it.
2.1. Nail Clipping
Nail clipping is easy and can only take a few minutes, especially if you have a well-behaved dog. Most owners (and you’ll find out later on that it includes us too) prefer nail clippers because they’re easier to find and they’re more affordable. That’s pretty understandable since you operate them manually.
The problem with nail clippers, though, is that you can accidentally cut your dog or hurt them if you’re not careful. Thick and hard nails can also be challenging to cut. These are the reasons we recommend getting a nail clipper built with different safety features; that is if you do choose to go this route of nail grooming.
2.2. Nail Grinding
Nail grinding produces a lot of sounds that can stress out some of our canine buddies. It is also a long process and will require an electric or battery-powered nail grinder.
Nonetheless, it can make thicker nails easier to trim. It also produces nails with smooth and rounded edges. If you do choose to get a nail grinder, we advise wearing a mask and eye protection. You should also expect that there’ll be a lot of dust in the process!
What We Recommend: Gonicc Dog Nail Clippers and Trimmer
For our Westie, we use the dog nail clippers and trimmer by Gonicc. We enjoy using it for its safety features such as:
- razor-sharp blades since dull blades can cause injuries and slips
- safety guard to avoid accidentally overcutting
- a safety lock to prevent the kids from playing with it

Aside from those features, this tool also comes with an anti-slip handle and a free nail file! Find the pros and cons of this nail clipper below.
Pros:
- Comfortable to use
- Well-designed
- Comes with a lot of safety features
- All-in-one nail grooming product
Cons:
- Blades will go dull after frequent use
- Some dogs don’t prefer being clipped, even with a safety guard on!
With your Westie’s coat detangled and the nails all trimmed down, it’s time to give her a bath. That’s why we are going to talk about shampoos next.
3. Shampoos
We don’t know about yours, but our Westie is the curious explorer type. It just loves to wander off and go on adventures, and before we know it, its white coat is already a soiled color or brown or gray! What’s worse is that sometimes, it even brings home some ticks and fleas. Yikes!
Fortunately for us, there are dog shampoos formulated to get rid of germs and other unwanted elements, including those creepy crawlers, from your dog’s coat.
A lot of different shampoo options are available out there. We’ll share our favorite in a while, so just keep on reading, but here are a few tips to keep in mind during your shampoo shopping:
- Identify the specific needs of your Westie first. For those who suffer from dry and itchy skin, you might want to get something with vitamin E, honey, and moisturizers. Those with organic herb and floral extracts are great for odor issues.
There are whitening shampoos too! We love to use one every once in a while for deep cleaning. Whatever you choose, just be sure to read the label. You don’t want any harsh chemicals in there. The more natural and gentle formulation is, the better.
- When in doubt, perform a patch test first. Do this with a little bit of product and observe the reaction for 24 hours.
- Finally, there are medicated shampoos for special cases. We suggest that you ask for your vet’s opinion first just to make sure a particular brand is safe for your pet. Reading online product reviews wouldn’t hurt as well, especially coming from dog owners who own the same breed as yours—like us, who are both blessed with Westies!
What We Recommend: Zesty Paws Oatmeal Anti-Itch Dog Shampoo
As we are both Westie parents, we recommend you to try out our Westie’s favorite shampoo. It’s the Oatmeal Anti-Itch Dog Shampoo with Aloe Vera and Vitamin E by the brand Zesty Paws.
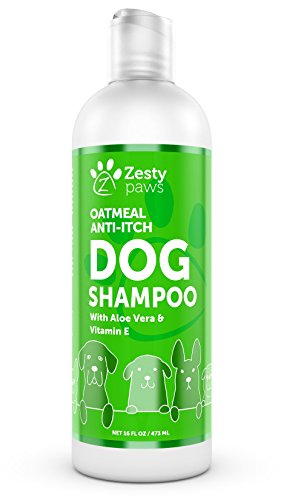
We love it because our Westie finds it very refreshing. The shampoo also soothes our Westie’s skin and makes its coat shiny and healthy. The secret lies in their formulation of moisturizing ingredients such as the ones we already mentioned above. Aside from that, we also love its cool, clean scent—perfect in deodorizing weird smells!
Pros:
- Uses healthy and natural ingredients
- Relieves itchiness and dry skin
- Smells good
Con:
- A bit more expensive than other dog shampoos out there
4. Ear Care Supplies
Wow, what a refreshing bath that was! Now it’s time to clean those ears. Westies might not have large mopey ears like other breeds, but boy, those pointy ears can still be prone to getting dirty.
As we’ve mentioned above, our little dog is the explorer type and an afternoon of fun and games can end up with pretty dirty ears. We can’t just leave those as they are since dirty ears can lead to ear infection and even hearing issues!
Don’t worry; there are three types of ear care supplies you can reach out to get those pointy ears nice and clean. Here they are:
4.1. Ear Cleaning Solution
The first ear cleaning product we are going to talk about is the ear solution. Sometimes called ear tonic, this is a liquid formula that comes with a dropper you can use to apply it to the ears.
Doing so will loosen any ear wax and dirt build-up. Your Westie will then shake its head instinctively which will then dislodge and remove whatever dirt there is in its ears.
4.2. Ear Cleansing Wipes
What about the dirt stuck in the outer ears? For that, you will need ear wipes. You can use these to easily wipe off any sticky substance and dirt from the outer ears.
Here’s a pro tip: you can use both the ear cleaning solution and wipes in tandem. Apply the cleaning solution first, and then when the ear wax and dirt have softened up because of it, it will make it easier for you to wipe them off using the cleansing wipes.
4.3. Medicated Ear Cleaner
Finally, there are medicated cleaning formulas similar to ear cleaning solutions. The main difference lies in the formulation of the two since medicated ear cleaners are meant to be used to treat infections and other ear issues.
Medicated ear cleaners are usually prescribed by your vet. If you believe that your Westie needs one, then please don’t hesitate to reach out to its doctor to get further advice.
What We Recommend
Now that you have an idea of the different ear cleaning supplies available for your dog, allow us to share our favorites.
1. Virbac Animal Health Epi-Otic Advanced Ear Cleanser

Let’s start with the ear cleaning solution, and for this we love using the Epi-Optic Advanced Ear Cleanser for Dogs, Cats, Puppies, and Kittens by Virbac Animal Health. It is a good solution for general ear cleaning. Its formulation is alcohol-free and it has a low pH of 2.2, which means that this cleanser is very gentle and safe to use on your pet’s sensitive ears
Another feature we love about this ear cleanser is that it has anti-adhesive properties. You see, other ear cleaning solutions out there can get a bit sticky which then invites more microbial attachment, defeating the purpose of cleaning your dog’s ears in the first place. On the contrary, this solution is non-sticky at all and can even serve as a drying solution.
Finally, it also comes with the “Epi-Otic Advanced Anti-Odor Technology” which is an exclusive feature that helps eliminate any ear odor. You will find the pros and cons of this product below.
Pros:
- Uses a gentle formula
- Removes ear wax efficiently
- Works well alone or with other ear cleaning products
Con:
- Not medicated; will need help clearing out infections
2. Pet MD Ear Wipes
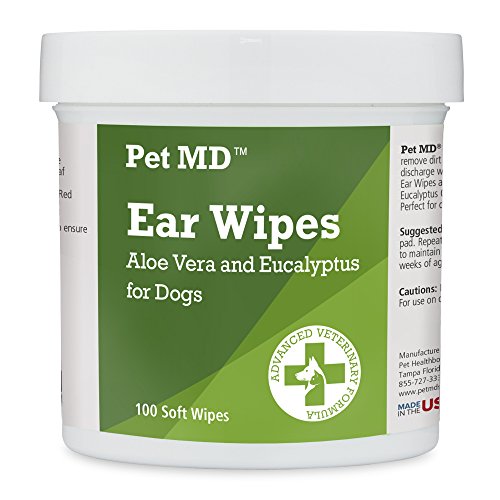
As what we suggested above, you can also use ear wipes on your Westie after applying an ear cleaning solution. For that, we use the Pet MD Ear Wipes with Aloe Vera and Eucalyptus for Dogs.
We love this ear wipe because it soothes itchiness and irritation. According to Pet MD, that’s because of the main ingredients of the product. One is aloe vera leaf juice, which has anti-inflammatory properties and antioxidants. The other is eucalyptus, which has antiseptic and anti-odor effects.
As similar to the Virbac Animal Health Epi-Otic Advanced Ear Cleanser, this ear cleaning product may also be used regularly due to its gentle, alcohol-free formulation. Another thing we love about these wipes is that they are already pre-soaked, making them ready for use. All you need to do is to peel one off of the package, and you’re all set to wipe those dirty ears clean!
To learn more about the product, we’ve listed its pros and cons below.
Pros:
- Uses a gentle formula
- Easy and convenient to use
- Works well alone or with other ear cleaning products
- One pack contains 100 wipes
- Safe for daily use
Cons:
- Wipes can be difficult to peel off because they are pre-soaked
- Meant only to be used on dogs over 12 weeks old
- Pads are smaller in diameter and thinner compared to other brands
- Works best on smaller breeds due to pad size (but hey, it works well on a Westie!)
Your Westie is probably sparkling clean from head to foot by now. That is all thanks to the grooming supplies we have been using so far. Of course, there’s probably one grooming step you still want to do, and that is to trim their fur.
Most of us leave that to the pros, and while there’s nothing wrong with that, there is still something gratifying in clipping your Westie’s hair on your own. For that, we’re going to need one last grooming tool: hair clippers!
5. Hair Clippers
Before you can even think of trimming that coat, you must get yourself a hair clipper first. The question is which one? There are six different types of hair clippers you can choose from for your Westie, and they are:
5.1. Corded Dog Clippers
First of all, dog clippers come in two categories according to their power source. The first of these two is the corded dog clipper.
It is the type of dog clipper that relies on an electrical cord, so you need to plug it into a reliable outlet for power. There are two reasons, though, why we enjoy using a corded dog clipper for Sami.
First, we don’t need to wait for a battery to charge anymore just to get our grooming session done. Second, a corded dog clipper is usually more lightweight than a battery-operated model, providing us better accuracy and control for a generally better cut.
What We Recommend
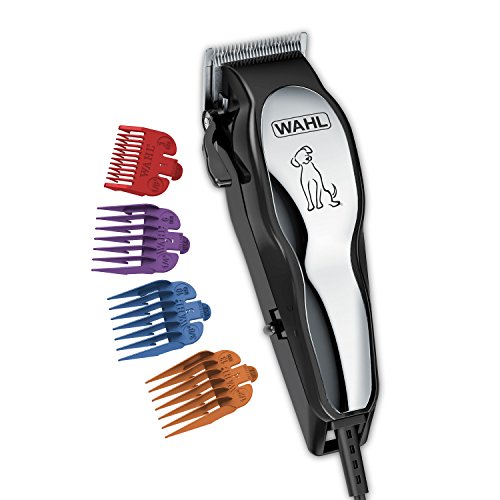
Our favorite corded dog clipper has got to be the Pet-Pro Dog Grooming Kit by Wahl. It’s specially designed to fit different kinds of dog breeds and coat thickness, and it’s perfect for Westies!
The self-sharpening blades are impressive and they last long. It also has a powerful motor which make each cut snag-free and quick. Finally, since it’s a grooming kit, it comes with four color-coded guide combs to fit any desired coat length.
Pros:
- Powerful motor
- Low-noise
- Comes with four guide combs
- Comes with a storage case
- Comes with a limited five-year warranty
Cons:
- Warranty will get void if used professionally
- Needs to be oiled frequently for optimum performance
5.2. Cordless Dog Clippers
If there are corded dog clippers, then there are also cordless ones. Some dog parents prefer this, especially if their pet moves a lot. After all, no wires will hinder you here.
We use a cordless dog clipper too, but only while traveling. We find it more convenient to use on-the-go even when there’s no outlet around.
We’re also going to share our favorite cordless dog clipper with you, but since it also shares the same category with another type of dog clipper, we are going to skip it for now and save it for later.
5.3. Single-Speed Dog Clippers
Moving on, did you know that dog clippers can also be determined according to the speed of their blade? There are two types of dog clippers in this category, and the first one is the single-speed dog clipper.
As the name suggests, it only comes at a fixed speed, and because of this, single-speed dog clippers are more affordable than others. Another good thing about them is that they are also less likely to heat up.
You see, more features mean more moving parts, and more moving parts suggest more activity inside your clipper and more heat build-up! This can be very uncomfortable for both you and your Westie.
Lastly, single-speed dog clippers are great for beginners because most of them are just plug-and-play models. No tweaking and set-up needed. Single-speed dog clippers are usually corded, but cordless variants are available as well.
What We Recommend: Oster Golden A5 Professional Animal Clipper
There are a lot of excellent single-speed dog clipper options out there, but our top choice is the Turbo A5 Professional Animal Grooming Clipper by Oster. First, the brand that made this clipper is known for their quality, and yes, the clipper is professional-grade!
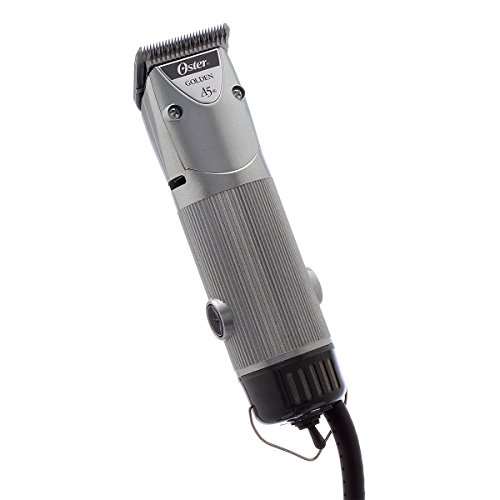
The set speed is at 2100 strokes per minute, and it comes with the exclusive “CryogenXBlade” by Oster, a blade cryogenically treated for toughness and longevity. This blade is sure to last long, and once it reaches the end of the road, you will be pleased to learn that it is detachable and replaceable.
Pros:
- Powerful single-speed motor
- Uses Oster’s cryogenic technology
- High durability
- Made by a trusted brand
Cons:
- Guide combs and storage case are not yet included
- Only comes with a one-year warranty
5.4. Variable-Speed Dog Clippers
If there are dog clippers that come with a single-speed setting, then there are also those that come with different speed levels. These are called variable-speed dog clippers.
The number of speed settings varies from unit to unit, but the most common ones only offer two. With that being said, more expensive variable-speed clippers can have up to five or more!
We love using our variable-speed dog clipper to groom our Westie for special occasions. That’s because the different speeds allow more accuracy and control on the look we want to achieve.
For instance, slow speeds are great for shaping, while faster speeds work best to clip through the most robust, thickest parts. The downsides of getting a variable-speed dog clipper are probably apparent already.
First, they have more moving gears inside, so they tend to heat up faster. Aside from that, these moving gears can get worn down faster when compared to those inside the single-speed dog clipper.
Those are the reasons we recommend getting a dog clipper model made by a reliable brand, as well as a unit that comes with a warranty. In this way, you can be sure to still get longer use out of it regardless of the vulnerabilities of the general design of the product. That is unless you find a promising brand like our top pick!
What We Recommend: Oneisall 2-Speed Dog Clipper
The Oneisall 2-Speed Dog Clipper is a professional-grade, cordless dog clipper that comes with two speed options: low and high. It’s an all-in-one product packaged with a stainless steel comb, stainless steel scissors, a charging stand, and guide combs!
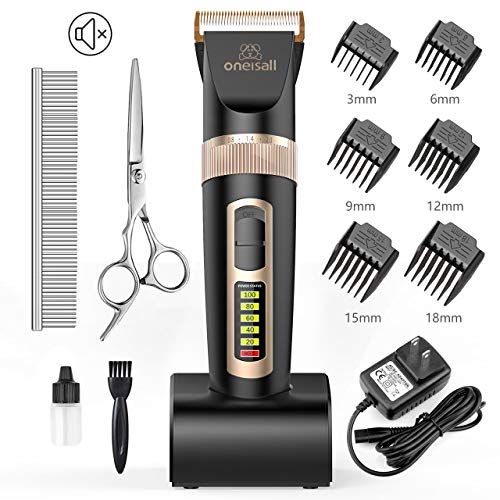
The blade is detachable for easy cleaning and replacement, but don’t expect to replace too soon. That’s because this unit comes with two blades namely a stainless steel fixed blade and a ceramic moving blade. Both blades are razor sharp, ready to clip, and snag-free.
Another thing that we love about this product is its intelligent charging mechanism. It comes with its own charging platform and has a built-in LCD indication, which will show the current state of your battery’s charge. To learn more about why we fell in love with this clipper, below are its pros and cons.
Pros:
- Built with a powerful motor
- Comes with a long-lasting battery of 2000mAh
- Low noise
- Comes with six guide combs and other grooming accessories
- Comes with a lifetime warranty
Cons:
- Doesn’t have a storage case included
- The brand is not yet as well-known as Oster and Wahl
5.5. Low-Vibration Dog Clippers
Finally, dog clippers may also be determined according to how they were designed to operate. There are two.
The first one is the low-vibration dog clipper. Remember when we mentioned above that we will be holding back our cordless dog clipper choice first since our favorite also falls under another category? That’s because our favorite cordless dog clipper is also a low-vibration one!
Dog clippers have a lot of moving parts inside, and these parts tend to vibrate. When they do, they heat up and make a lot of sounds. As we’ve mentioned above, using a hot dog clipper can be very uncomfortable for both the dog and the user, while a noisy one can cause your Westie a lot of stress—and we don’t want that!
We advocate dog grooming as a potent bonding experience, after all. Fortunately for us, we’ve found a great low-vibration dog clipper that we are going to share with you below. The clipper is also manufactured by the same brand featured above: Oneisall.
What We Recommend: Oneisall Low-Noise Dog Clipper
Here’s another professional-grade, cordless dog clipper from Oneisall. Unlike the previous one, though, the Oneisall Low-Noise Dog Clipper doesn’t come with different speed settings. Its defining feature is its low vibrations, after all.
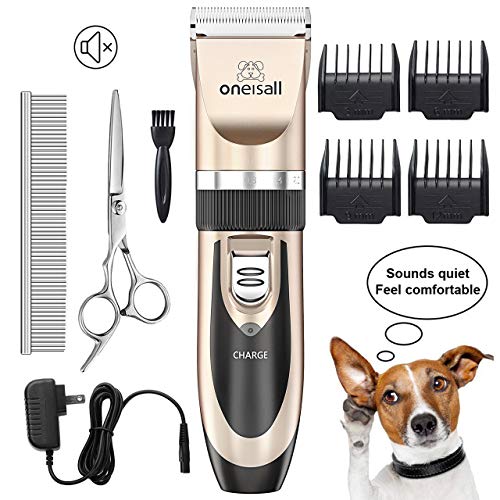
This unit boasts of producing only 50 decibels of sound during use, and that is as loud as a relaxed conversation at home or the ambient sound of a library. Thus, it’s relaxing.
What this unit has in common with the previous one, though, is that it is also an all-in-one product. It also comes with its own stainless steel comb and scissors plus a set of guide combs.
The blades are the same too: a fixed stainless steel blade and a moving ceramic one. Both are razor-sharp and detachable for easy cleaning, and of course, replacement once needed.
It doesn’t come with a charging port but it comes with its own charger, and of course, a built-in battery alert system.
Pros:
- Low noise and low vibration
- Doesn’t heat up as much as other units
- Can be used while charging
- Comes with four guide combs and other grooming accessories
Cons:
- Battery capacity was not provided
- Doesn’t have a storage case
- Jams up when used on super long fur
5.6. Professional Dog Clippers
The last type of dog clipper that we are going to share with you is probably the best of all we’ve listed so far. This, by the way, is the second type of dog clipper in the final category of dog clippers—professional ones.
You might have noticed that we have mentioned there are professional-grade dog clippers already in our previous selections. That’s the thing, though, professional-grade clippers only function like professional ones but when put to the test of using them in a salon setting, most of them may fail to deliver. After all, they were all made for home use.
For those who are looking for a really durable and hard worker, then a professional dog clipper is the choice for you. Just keep in mind that since these clippers are usually packed with advanced features, be prepared to invest.
What We Recommend: Sminiker Professional Pet Hair Clippers
We bet you were impressed with the grooming kit we have shared with you a while ago by Oneisall. Remember the one that comes with six guide combs?
Well, the additional accessories are really worth every penny, but those inclusions cannot compare with the Cordless Pet Grooming Kit by Sminiker Professional.
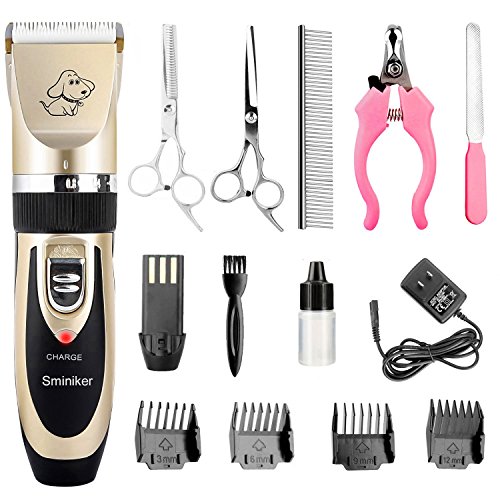
The kit comes with only four guide combs, but it also includes two stainless steel scissors (flat and teeth), a stainless steel comb, a dog nail clipper and a nail file. It even has its own cleaning brush!
As for the dog clipper itself, it has a powerful yet silent motor; it specifically produces 60 decibels. It has two blades, including an angle blade made of titanium and a moving one made of ceramic.
Additionally, this dog clipper is cordless and lightweight, making it easier for your wrists. It can also operate continuously for a full 70 minutes
Pros:
- Can be used by professional groomers at salons
- Powerful motor
- Durable build
- Low sound
- Steady and stable control
- Comes with a complete set of grooming accessories
Cons:
- Warranty was not specified
- Battery capacity was not provided
- Storage case not included
To be honest, the only real factor that we have against this product is the warranty. Otherwise, it really hasn’t failed us yet. Anyway, those are the different grooming essentials together with our top picks.
We hope we have provided you with all the information you need to create a grooming kit for your own Westie. Here’s a common question we’ve been getting, though: “I already have a clipper, do I really need to purchase another one just for my dog?”
Can You Use Human Hair Clippers on Dogs?
There’s no need to get embarrassed if you’ve been thinking about this as well. As what we've said, we get this question a lot. That’s probably because human hair clippers and dog clippers look pretty much alike, but don’t be fooled! They have significant differences, including:
- Human hair clippers have tighter blade teeth compared to dog clippers. That’s because humans also have thinner hair strands compared to our canine buddies’ thick fur.
Hence, using human clippers on a dog will cause it to jam. It can be very uncomfortable for your furry buddy and might even cause them pain. Just don’t do it!
- Another difference is the speed level. A clipper designed for human use will have a slower speed because our hair is easier to cut through, but that’s not the case for your pet’s fuzzy coat. This is the reason why some dog clippers come in variable speeds; to allow the pet groomer to adjust when needed.
- Finally, the overall design of both clippers is simply not the same. Dog clippers are made to have less vibration and noise, accommodate sharper blades for moving across thick and wiry hair, and heavier metal housings for added durability. No wonder they are more expensive than human clippers!
So please, don’t even try to use your own clippers on your poor Westie. There are hundreds of dog clipper options out there that can fit any need, preference, and budget.
Once you’ve found one, together with the other dog grooming essentials we have listed above, you will be ready to start your Westie’s grooming session.

How to Choose the Right Groomer
There are a lot of dog groomers out there. That’s pretty understandable. Pet grooming is a very profitable business. The question is, how do you choose the right groomer for your pet?
1. Ask Other Pet Owners for Recommendations
While you’re at it, take a look at their pets, too. A well-groomed pet is a perfect testimonial on how good a groomer is. Make a list of at least three to five groomers to look at and visit.
2. Do Your Research Beforehand
Pare down your list according to the groomer’s credentials. Does the groomer have proper certification? Is he or she a member of a professional grooming organization like the National Dog Groomers of America Association?
You may also research if there’s a professional grooming organization in your area and inquire about their members who are nearest to your location.
3. Visit the Top Groomers on Your List
Were you able to pare down your options to two to three groomers? It’s time to visit them and observe their work.
While you’re there, take the chance to ask them about their specialties already, especially if they have any experience in handling Westies. Some groomers choose to become experts on certain breeds.
4. Just Go with Your Guts
We believe that you will be able to make the choice after talking to your final groomer options. As a dog parent, you can gauge, more or less, if the energy or “feel” of that groomer will match the personality of your pet.
Bringing Your Westie to the Groomer
We are almost drawing to the end of this guide, and before it does, allow us to share some final tips on how to take your pet to the groomer for the first time.
1. Get Your Dog Comfortable with Being Touched
Your dog might enjoy being cuddled from time to time, but how do you think will it react to its paws being held? Or its ears being inspected? Or its tail being moved out of the way of its butt? A confident pet that’s used to being touched in different ways will make any groomer happy.
2. Brush Your Dog’s Coat Regularly
This will make your dog get used to the general sensation of being groomed. It will also make your dog’s hair silkier and easier to work with.
It’s this simple: think about your Westie’s hair as if it were your own. Just imagine your hair’s condition if you don’t brush it for several months. How do you think you would feel? The feeling is mutual with your canine buddy.
3. Take Your Westie to the Groomer Early
You might not see the need to take your puppy to the groomer right now, but doing so and letting it experience a quick “introductory” session will make future and longer sessions less stressful. A grooming session can be traumatic for an older first-timer since they are less adaptable to change, at least, not as much as puppies are.
4. Talk to Your Groomer
Tell the groomer the exact details of how you want your pet to be groomed, and remind him or her before every grooming session. You might think that your groomer will soon learn your preferences after a while of getting their services regularly, but they work with a lot of different dogs every single day—all of which requires slightly different owner preferences.
Also, if possible, there’s no harm in befriending your Westie’s groomer. A lot of people can take the role of the groomer in their dog’s life for granted, without even knowing that they actually play a vital one in their pet’s health.
Final Thoughts
You have reached the end of our guide. We hope that you have found it informative and helpful. Here’s a quick summary of everything we have discussed as reference:
A Westie needs a lot of TLC. That includes regular grooming. There are two ways to do this: you can do the grooming yourself or you can take your buddy to a professional groomer.
If you decide to DIY your Westie’s grooming, here are the essentials that you will need:
- A selection of different brushes and combs that fit the hair quality of your Westie.
- A nail clipper and file. You can use a nail grinder too.
- Shampoo that’s specifically formulated for dogs, preferably one that doesn’t contain a lot of chemicals which might irritate a Westie’s sensitive skin.
- An ear cleaning solution and cleansing wipes.
- A durable and easy-to-clean dog clipper.
You can perform your grooming at home by first detangling your dog’s fur. You can then proceed to give him a bath while allowing the shampoo product to soak for a bit on its coat.
After a good rinse, help your dog dry its fur and you may now clean its ears and trim its nails. Finally, trim its coat down to your desired length and style.
For those who don’t want to perform their own grooming, though, you can choose from a variety of professional dog grooming options. Just make sure that the groomer you choose is certified. Plus points if you find one who specializes in Westies.
Practicing basic grooming tasks such as brushing and rinsing at home is still recommended, though, to make your dog more secure and confident during its grooming sessions.
For more information on dog grooming and Westies, or if you just want to get to know our own Westie, Sami, then please feel free to explore our website further. See you in the next article!
Related Guides
More detailed grooming guides:

About Westie Vibes
Westie Vibes is the home of Sami the West Highland White Terrier — tips, stories, and everything we’ve learned about life with a Westie.
Follow along and subscribe for weekly updates.